
Materials Needed:
- coffee table, bench, OR 2 pieces of pressboard (12"+ x 36"+) and short (18") table legs
- flat metal leg brackets (found at Ace or Home Depot)
- 2" or 3" foam, from craft store
- fabric for bench (enough to cover the area of the top of the bench + at least 10" added to each dimension)
- batting (enough to cover area of top of bench + at least 10" added to each dimension)
- wood screws
- drill
- Zinsser bonding primer
- black satin spray paint
Step 1: I found 18" table legs and 2 pieces of pressboard at a local thrift shop. NOTE: make sure the boards are FLAT and not warped in any way. Ours were warped and make extra steps to level the bench! You can use a small coffee table, that's at least 20" tall. Our boards were 12" wide by 36" long.


Step 2: Using the flat metal brackets, screw the legs into the brackets. You will need to also drill a hole large enough for the threaded table legs to fit into on the BOTTOM of your bench (one piece of board). Our holes were 3/8" wide, and about 1/2" deep to house the threaded screws of the legs.
Step 3: Drill pilot holes for the flat metal bracket screws into the bottom of your bench board.


Using the included screws with your flat metal brackets, attach the legs to the board, tightening the screws in a star pattern (top left, bottom right, top right, bottom left).
Step 4: prime and paint legs and boards, using a foam brush. Lightly brush on the primer, covering all areas that will be painted. Once dry, spray paint the legs and boards, holding the can 4-6" from the target. I painted the sides and top and bottom of all pieces. Allow to dry overnight or more.


Step 5: We bought 2" foam at Joanns, with a 50% off coupon. It's pretty pricey stuff, so getting it on sale or using a coupon definitely helps! We decided to go with the 2" thick foam, and use two layers of it. At Joann's, it's a 24" wide piece. We bought 1 yard (36"). Our bench boards were 12" wide, so we could just cut the 24" wide piece of foam in half, double layer it, and have a 4" tall bench cushion!
We measured and used a yard stick to draw a straight line on the foam, using a sharpie marker. Using a bread knife, cut the foam in half. It should cut like butter!


Step 6: Create the cushion! Lay your fabric out first, and batting on top of that. Both need to be long and wide enough to fit down over the foam and board, so it needs to be larger than the foam/board dimensions. Lay the 4" of foam on top 7of the batting, and the NON-legged board on top of the foam. Pull the fabric and batting tight up around the edges of the foam and board. Using a staple gun, staple the fabric and batting to the board, TIGHTLY. You may want to do the batting first, by itself, and THEN the fabric for a nice tight grip. Staple one side first, and pull tight and staple the other side.


Step 7: combine the two pieces - the legged board, and the cushioned board. Place the two pieces together, and drill pilot holes up through the bottom of the bench, into the cushioned board. We drilled a hole on all 4 corners. Using wood screws, we attached tightened the two pieces together to create one solid bench.


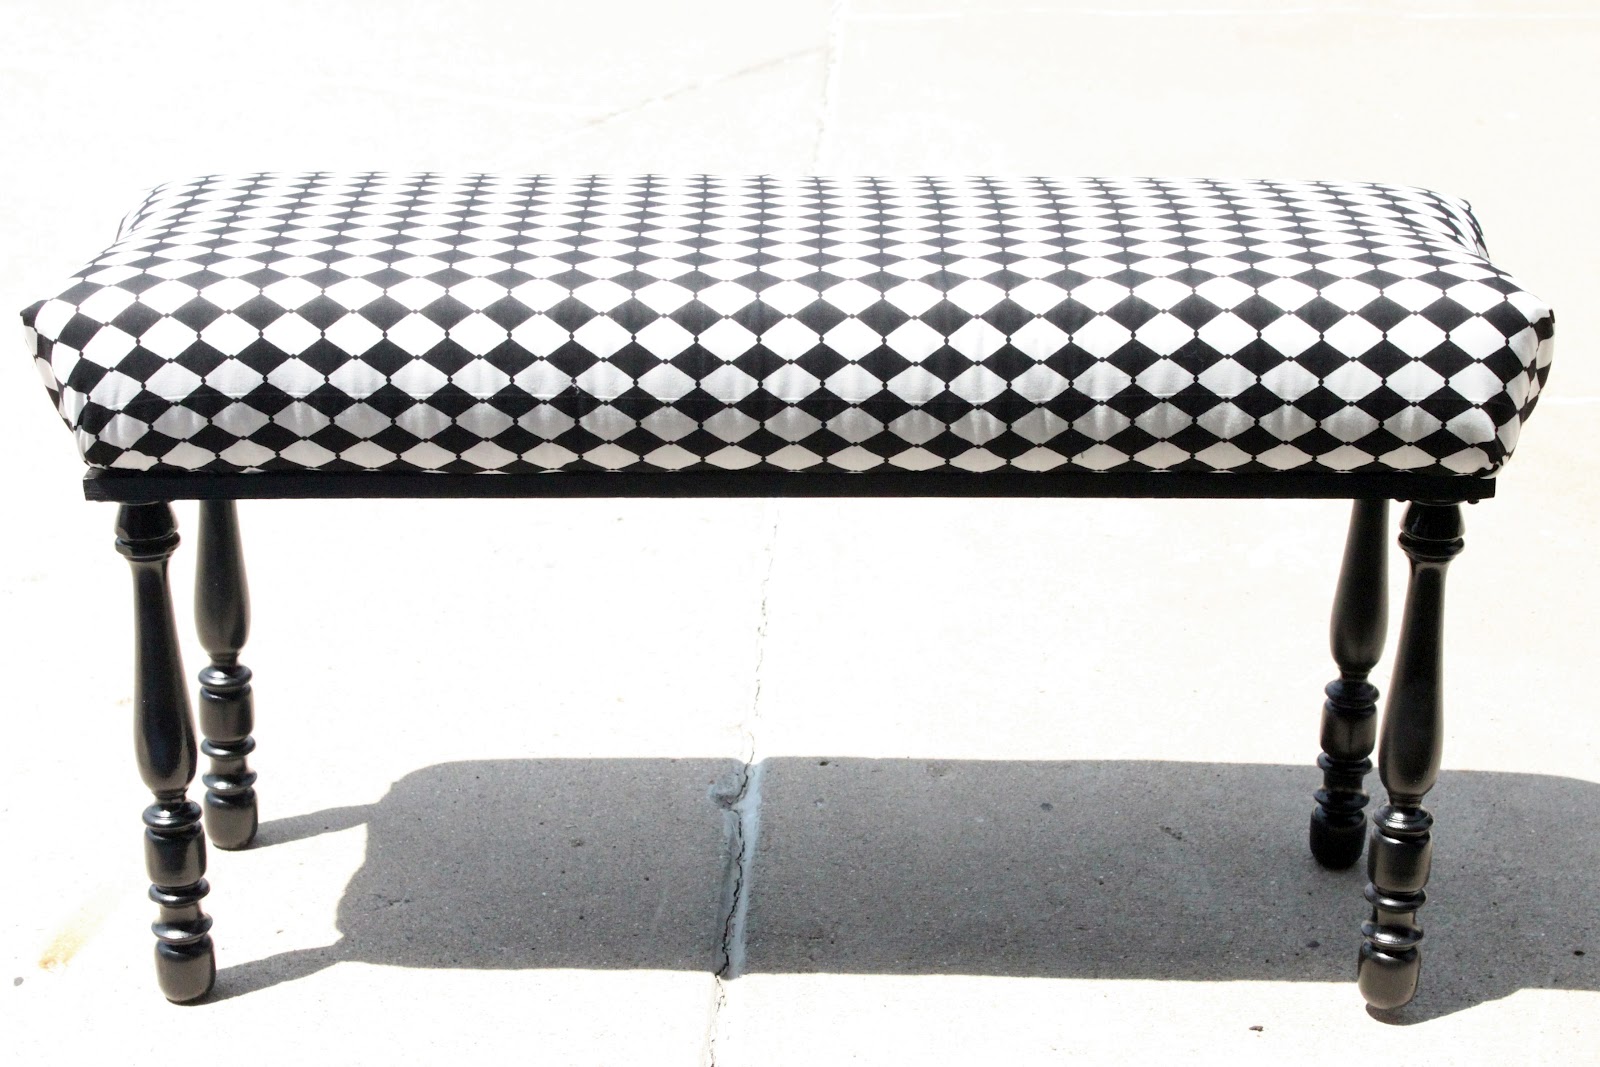
Step 8: Viola! Bench!

NOTE: We are going to be drilling holes between the bench legs (on the short side) - and adding a wooden dowel rod to stabilize the bench. Because the boards were warped a bit, the legs don't sit level.
No comments:
Post a Comment